“A drawing is simply a line going for a walk” - Paul Klee
Seeing a one-line drawing never gets old. Even as someone who makes them, I find myself happily following along the lines of my own drawings as I explore the story being told and the feelings it invokes.

If you’d like to try it out yourself but aren’t sure where to start, here are the steps I use to make Lineart’s designs! I use photoshop and a drawing tablet but this can be done using nothing but a pencil and a paper as well.
It’s challenging, and can sometimes be frustrating not having a clear way forward, but the process feels so rewarding as you get to grips with it and start to develop an ability to draw your own happy places.
Step 1: Come Up With Your Idea
What is the feeling you want to portray? This should be your launching point.
From there, you can start exploring what subjects invoke that feeling. If you want to portray love, then what are the things that you associate with love? Is it the embrace of a partner? Is it nature?
The sky is your limit here, you can combine as many things as you’d like, building up the components of your perfect happy place. This step is all about putting ideas down onto a page and thinking about how they can work together.
Don’t worry about where to put every bit of the puzzle yet, just put things down.
A general rule of thumb is to use between 1 and 3 subjects. You can use more, but it may become crowded or challenging to compose.
Step 2: Build a Reference
When you have your components, you can start making your composition work by moving the bits around.
I found the easiest ways to do this are through rough sketches with a pencil, then by building up a reference on Photoshop. To do this, I find pictures of my subjects with roughly the right angle, then cut out the important bits and add it to a layer in photoshop. When I have the bits from all my subjects, I can easily move them around until I find something that works.

A lot of times, this process ends up with me changing the angles I imagined, and experimenting with different combinations until I find the best one. The general rules of composition can help you find something that works:
Rule of Thirds
Split your picture into 3 rows and 3 columns. The lines which are created, and their intersections, are great places to put the main focal points of your images, such as horizon lines and faces.

The Golden Ratio
A rectangle has the golden ratio when the ratio of the length of its sides is the same as the ratio of their sum to the larger of the two sides. Basically, a ratio of approximately. 1:1.62
The Fibonacci spiral uses this ratio and is a great way of directing attention in an image.
Imagine splitting a rectangle along this ratio vertically, then splitting one side of that using the same ratio horizontally, and repeatedly doing this in a circular fashion.
You’ll get a set of points you can connect which form an attention-grabbing spiral. This is the Fibonacci Spiral.

Placing objects along the curve creates a pleasant experience for the viewer, easily guiding their eyes along the piece.
Balance
Remember that you will be taking viewers on a journey from the start of your line to the end.
A balanced drawing has a line which is equally spread out across the page, not being too concentrated in a single area. This creates a feeling of peace in the image.
Unbalanced drawings can be used to invoke feelings of tension and unease. If you want to create balance, step back and look at your picture. Does one part carry significantly more visual weight than another part? If not, then you’ve created balance.
Movement
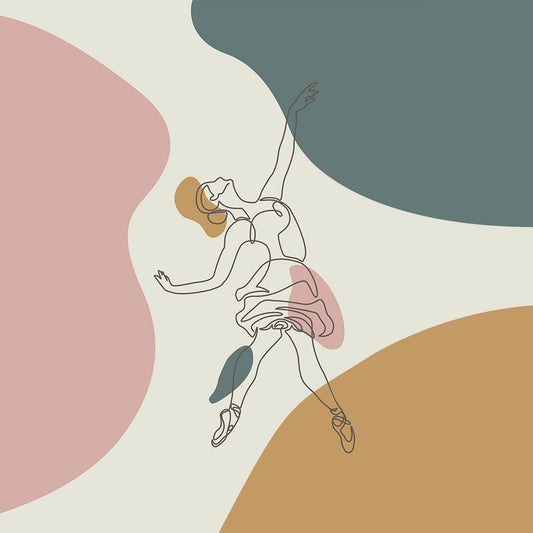
If you have a moving subject, does it show that it’s moving? Don’t be afraid to draw things in the middle of their movements, whether it’s a dance move like "Liberty" or a simple step.

If you do this, be aware of which direction the subject is facing. A rule of thumb is to have the subject facing/moving into the canvas; if the subject is a face and it’s on the right of the design, the face should be facing the left side of the drawing.
Step 3: Sketch Out the Important Features
This step is all about picking what details we want to capture, and what we can leave to the imagination.
Reference pictures may not have clear outlines, and with single-line drawings we risk overcrowding the piece if we try capture everything and don’t prioritise certain details.
Find the most defining shapes and curves in your subjects, and sketch them out. Don’t worry about being tidy, at this point we just want to turn or reference into something linear. Digitally, you should do this on a new layer. On paper, you can use wax paper as a great tracing paper over your reference/sketches, or just another paper.
A good question to ask yourself when looking for these defining lines is “What are the biggest clues that this object is whatever it is?”
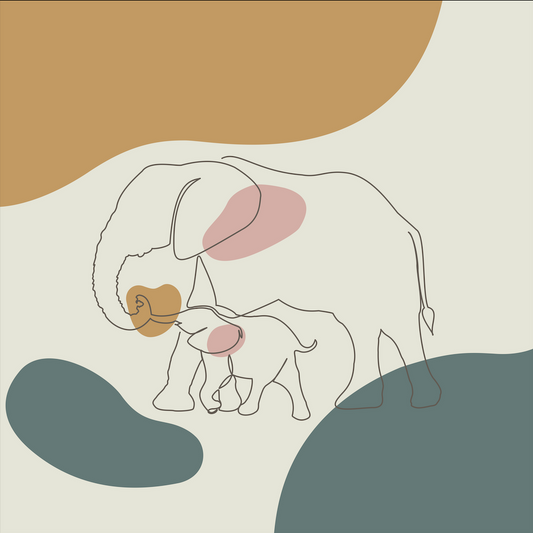
For example, if it’s an elephant, then how do I know it’s an elephant? The biggest clues are the shape of its ears and trunk, while the eyes may not give much indication. From this, I knew what to show when drawing “Embrace”.
Step 4: Find Natural Starts & Ends (If They Exist)
Our final design will have a single line, which starts at one point, goes for a walk, and ends at another point. This step is about identifying if there are any obvious places to start and end the line.
Finding where to start and end the line’s journey can be tough! Countless times, I’ll experience tricky lines and think “I wish I could add another start here”.
I found that there are 2 factors which can influence this:
- Parts of the composition which are natural line endings, such as the jawline in Liberty.
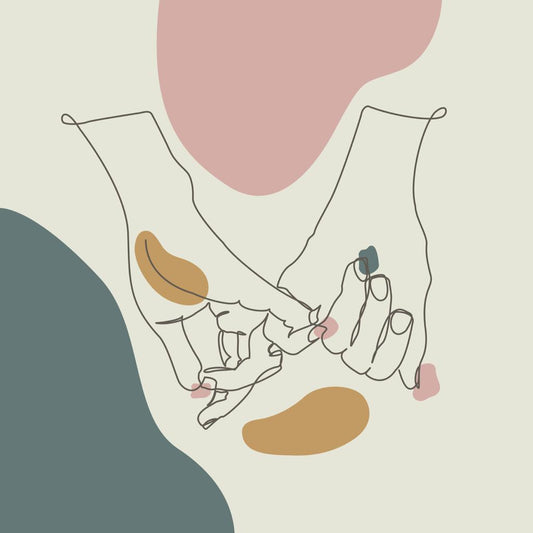
- Difficult forms which can’t be made continuous, such as the upper arm in "Harmony".
Step 5: Experiment With Routes!
Now that we know what lines we want, we can start combining them into one. This can be one of most challenging but rewarding parts.
Divide and conquer
Your first instinct may be to start at the beginning of the line and make it flow to the other end. I don't do this, but feel free to give it a shot, and if that works for you, then great!
I found that approach overwhelming, and found it easier to build up small pieces here and there, then connecting those pieces.
To make this effective, I divide the design into blocks, and treat each block as a complete piece; give it a single start and end point, so that you can then build up these blocks which are ready to go, then connect them easily. I did that with Liberty, splitting her into the legs, the torso, the arms and the head.

Handling intersections
Where lines intersect, it can be difficult to decide which way to take the line, or if it’s even possible. A simple rule to remember is that if you want to have an even number of sides intersecting; if you have 3 lines at an intersection, you can connect one pair using one line, and will be left with a line that has nowhere to connect to, like you can see below.

Step 6: Polish
Almost there! Time to take a break, then zoom out on your line to spot anything that needs refining.
Almost there! Time to take a break, then zoom out on your line to spot anything that needs refining.
If you like the hand-sketched feeling of the line you have now, you can focus on making sure you’re happy with the shapes and the flows. If you prefer the Lineart style, then you’ll need to use the pen tool to trace over your line and create a smooth shape.
Get Started
Remember that no art you create is “bad”; let go of judgement, pick up a pencil or tablet, and take your line for a walk to make your beautiful happy place a reality.
If you choose to give this a shot, I’d love to see your creations! Post them on social media and tag us, or use the hashtag #joyinoneline for a chance to be featured on the page.